Do you need to install a polyurethane deck coating, but don’t know where to start? Look no further! We’ve put together this blog post with 11 steps that will lead you through the process.
You’ll learn what supplies and materials you’ll need, and why they are important. We also have step-by-step instructions for applying the primer coat, followed by two coats of the finish coat.
Step 1: Gather Your Supplies
- Painter’s tape in order to mark off areas that need attention and an old tarp, drop cloth, or newspaper on the ground below your deck so you don’t get paint everywhere while doing this project.
- Roofing nailer and compressor – If you don’t have these, use a hammer instead to secure the staples in place. Usually two rows for every staple is enough.
- A box cutter or utility knife (to cut through old deck boards).
- A staple gun and staples (to secure the new boards together).
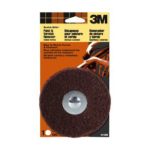
- Sanding block to rub down any irregularities in the surface of your deck before applying polyurethane. This should be done with each board if you have a thick coat of paint or stain on your deck already, but only needs to be done once if you don’t.
- A paintbrush to apply the primer coat.
- A roller or brush for applying two coats of polyurethane finish.
- Paint trays for the primer and finish coats ̶ large enough to hold at least three gallons of paint.
- Drop cloths for underneath your work area, and a tarp or old sheets in case of spills.
- Wooden boards that are cut into smaller pieces and painted with a latex base first, before being applied as new decking surface tiles. Get these premade at a hardware store to save time.
- A bucket or large bowl for water.
Step 2: Clean Your Deck
First things first: clean off all of the dirt and grime that has collected on your deck over the years. Use the water from your bucket or bowl to scrub down all surfaces of your deck.
Prepare the surface of your deck by cleaning and sanding to remove loose or rough components. Be sure not to use an electric sander (or similar) because it will cause static electricity that could create a fire.
Use coarse grit sandpaper instead, like 60 or 100 grit for best results. You may also want to use a scouring pad or deck wash for getting out stubborn stains.
Be sure to get in between boards with a rag or sponge after you’ve been scrubbing for about ten minutes so that you can get out any dirt that’s wedged in.
Finish by sweeping all of the debris off your deck and into the dirt below, before moving on to the next step.
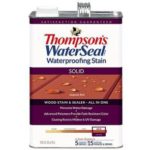
Step 3: Apply the Primer Coat
Mix up a batch of wood primer according to the manufacturer’s instructions (usually one gallon for every 400 square feet).
Apply the primer coat, which is necessary in order to protect your surface and provide adhesion between paint coats. It’s best if you purchase an oil-based priming agent that will last longer outside of humidity levels like waterborne coatings.
Use your paintbrush to apply a thin layer of the primer coat over all surfaces of your deck.
Step 4: Allow to Dry
Allow the primer to dry for a few hours before applying your first coat of finish paint, which will cover all surfaces and provide protection from UV rays (sunlight).
Be sure to apply an even coat with no bubbles or streaks in order to avoid brush marks that can show up on the surface. Allow time between coats so that the paint can dry.
Step 5: Apply a Second Coat
When the first coat of finish is completely dry, apply a second coat to cover up any exposed areas and ensure high-quality coverage. This will also help with discoloration over time.
Step 6: Prepare Your Boards
Lay out your boards in an organized fashion below your deck, with a gap of at least two inches between them.
Lay down the pieces that will go on top first, then lay the bottom row over it so you can make sure they are all lined up correctly and to avoid confusion later.
Step 7: Adjust the Time to Paint
If you are painting in hotter temperatures (above 90 degrees), it may be best to wait until evening or to do the painting in the morning.
This gives your paint time to dry before evening when it will be exposed to higher humidity and temperatures, which can cause bubbling or peeling of paint due to moisture retention.
Step 8: Wipe Down the Surfaces
Wipe down all surfaces of the newly applied polyurethane with a damp rag, and then dry off any excess moisture so that you have a smooth finish to work with.
Step 9: Test Your Deck for any Missed Spots
Use the painter’s tape to mark off all of the boards on which you can see a spot where paint is still visible. Finish by using a damp rag and clean water from your bucket or bowl to wipe down these surfaces, then dry them off.
Repeat until there are no more missed spots on your deck, then move on to the next step.
Step 10: Clean Up Your New Deck
Use the tarp or drop cloth that you placed under your work area (or old newspapers) to clean up any paint drips after you’ve completed this project.
Step 11: Allow to Cure
Once you have completed applying all coats of primer and finish, allow about a week for them both to cure (dry) before you use the new deck.
Conclusion
Now that you know how to install a polyurethane deck coating, go ahead and get started! But don’t forget the supplies.
In addition, it is important to remember that a polyurethane coating will require periodic maintenance, with the first annual coat being applied next spring.