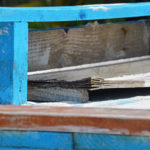
Wood paneling is a great way to add visual appeal and insulation to your home. However, as time marches forward, the wood will oxidize and lose its luster. Fortunately, there is a simple solution that you can try at home: painting it! This guide will outline the process in detail.
Step 1: Gather all of Your Supplies
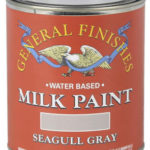
- One can of primer
- Three cans of paint (one for each coat)
- A putty knife
- Wood filler or spackle
- Two large paintbrushes – one to use with the primer and another to use with the top coat color
- 300-500 grit sandpaper
- A clean rag for wiping your brush after using the primer and top coat
Step 2: Remove Flaking Paint
Remove the old paint from the wood paneling. Use a paint scraper or sandpaper. Then, clean off all debris and dust with a cloth and soapy water. Ensure that the walls are completely dry before applying new paint.
Remove flaking paint from the wood paneling using the coarse side of the 300-500 grit sandpaper. It would help if you made several small swipes across each surface.
This is important to do before you begin painting because it helps to remove any loose pieces of wood and smooth down any splinters. It will also allow the primer to grip the surface better, resulting in a flatter surface once the paint has dried.
Step 3: Fill Any Holes or Cracks
Use your putty knife to fill in any holes or cracks within the wood paneling. For small spaces, use spackle. For larger ones, use wood filler designed to handle high volumes of moisture. Once dried, lightly sand over the surface with 300-500 grit sandpaper.
Step 4: Check for Dirt or Grime
Once sanded, wipe down your paneling with a light dust cloth to remove any excess sawdust.
Before you paint, check that your surface is clean by checking for dirt or grime along the edges of the panels. Use a flat razor blade and gently scrape off any stubborn dirt. Do this on both sides of the paneling boards and any exposed joints between them so the surface is even.
Step 5: Apply the Primer
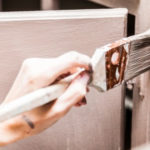
Once the paneling has been sanded and cleaned, apply a coat of primer to any bare spots left by loose wood pieces. Allow the primer to dry before continuing with your paint job. If you are applying multiple coats of primer or paint, always allow enough time to dry between coats so you don’t cause any streaks.
Use the brush (the one you used to apply primer) to coat an area no larger than two feet by two feet in the corner of your house, following the directions on the primer can. Be sure to work with a steady hand for this step; mistakes made here cannot be undone later.
If there is already paint on the wood, use the coarse side of the sandpaper to remove it. Let this area dry for at least half an hour.
Step 6: Repeat Steps Above
Repeat the steps above over every surface of the wood paneling that you have not yet painted – even those untouched by flaking paint. Use additional primer on these areas if they are particularly porous or scratched.
Step 7: Apply the Paint
You are ready to begin painting the wood paneling, but be careful not to overdo it. Just like with primer coats, make sure you allow enough time for your coats of paint to dry before applying the next one.
It is also important that you use oil-based paint or latex paint. Latex paint will not damage your paneling and will result in a flat surface once it has dried, which you want to have if the paint’s final coat is a semi-gloss or gloss. This will create a nice sheen over your wood paneling.
Use a clean brush to apply two coats of high-quality paint in your choice of color. Let these coats dry thoroughly before moving on to your next step.
When doing this, be sure you work with a steady hand; correcting mistakes made during this step will be much more difficult.
Step 8: Re-Apply the Paint
Use the brush (the one you used for your top coat) to give two coats of paint in your choice of color, following the directions on the can. Again, let these coats dry thoroughly before moving on to another task.
Step 9: Check Your Work
When you are finished, your wood paneling should look as good as new! And if it is not, you may need to consider replacing some of the boards.
Conclusion
Painting your wood paneling is a great way to quickly update the look of an old room, but if you’re not careful, it can also damage the texture and feel. Thankfully some easy steps will help preserve the appearance and natural properties of your wood paneling, so you don’t have to worry about either aspect.
Whether you’re looking for advice on how to paint over untreated or painted panels, this guide covers you.